Making the server Stratum 1 using a GNSS receiver
If you've followed the previous parts of the guide, you should now have a Stratum 2 NTP server ticking away nicely. The stats below show that we have RMS Offset in the region of low hundreds of microseconds. Not bad! This is probably driven by temperature fluctuations, but we'll discuss that in the optimisation part later.

In this part, we'll take that Stratum 2 NTP server and add a GNSS receiver, making it a highly precise Stratum 1 server.
At this point, I'd like to thank Jacob Deane for his excellent guide (linked below) on setting up a Stratum 1 timeserver using the NTP package. This was incredibly useful in helping me get my own journey started on this project.
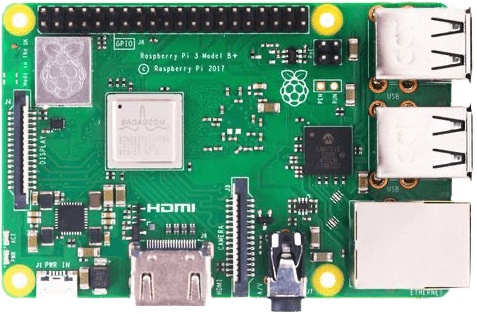
Requirements
Other GNSS receivers are available and will work, but this is the one I'll be writing about. Specifically, Rev 6.4 with the USB C connector
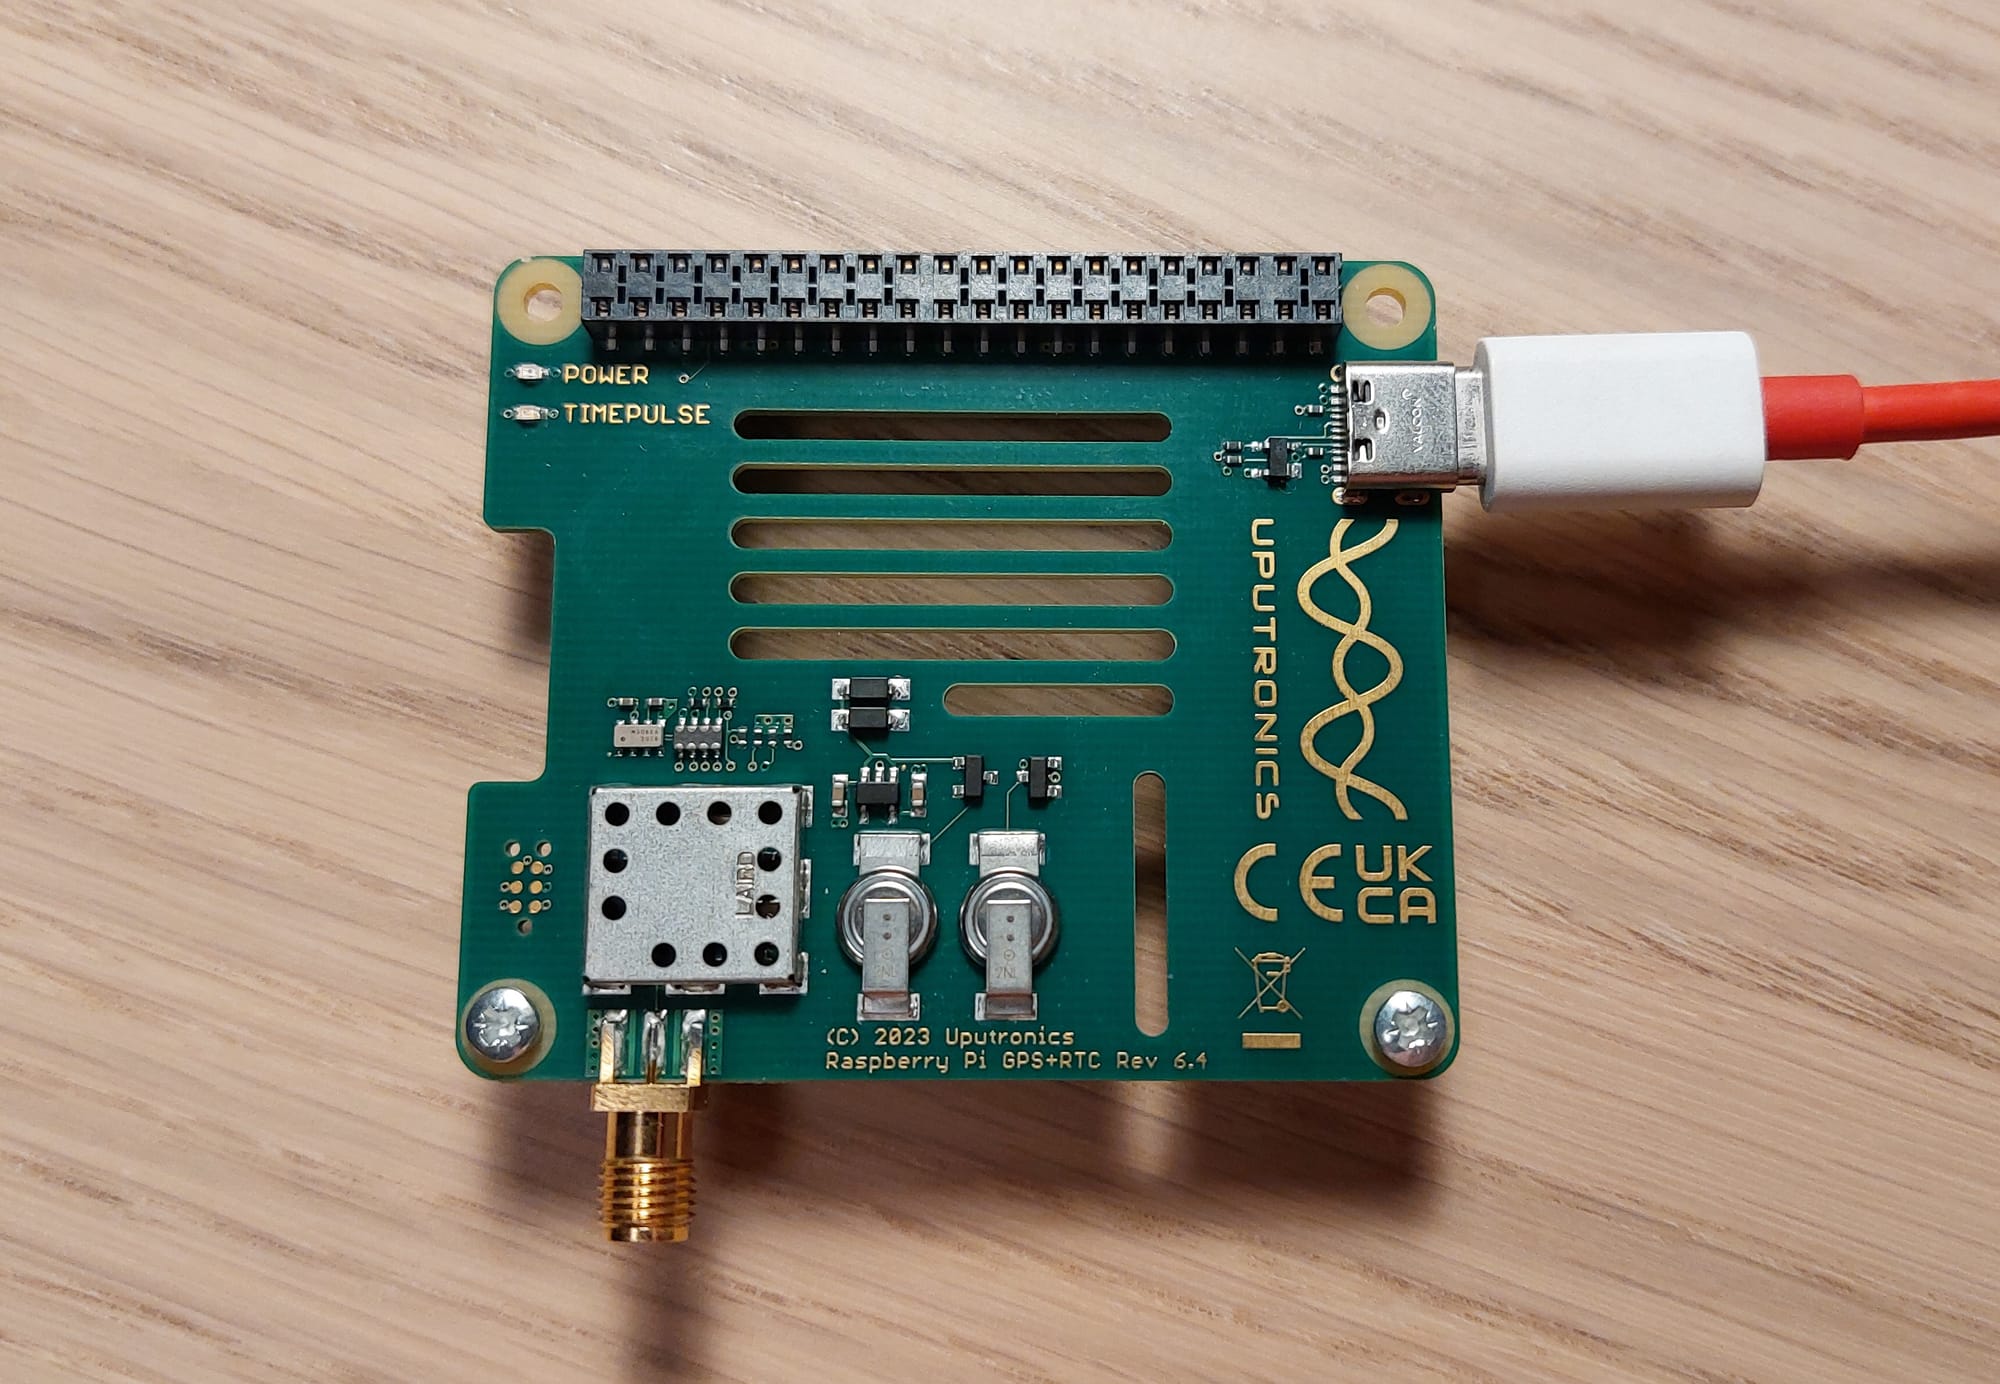
- GPS Antenna with cable an SMA connector
- A Windows computer running U-Blox U-Center [Optional, for resetting step]
Linux users: I couldn't get U-Center to connect to the GNSS receiver when running on WINE, so had to use a Windows PC. Your mileage may vary.
Resetting the GNSS receiver [Optional]
This step may not be necessary, but I want to start the receiver with a clean slate. If any programming has been done previously, it could make the optimisation process later harder to follow.
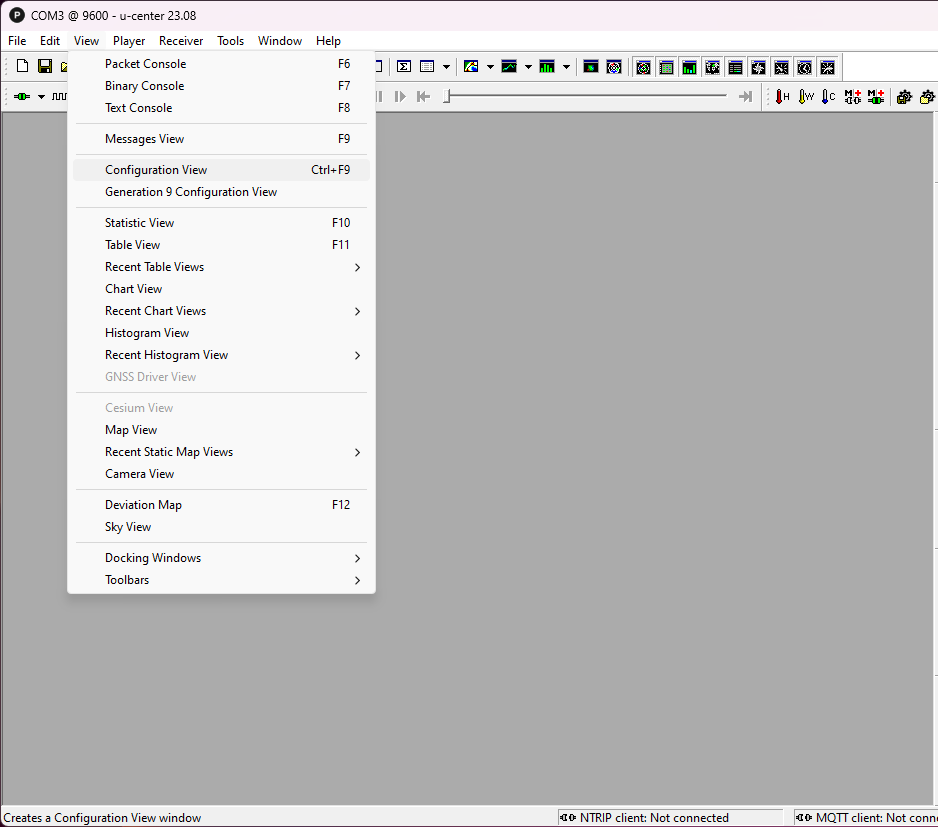
- Open up U-Center and connect the GNSS receiver.
- Enter 'Configuration View'
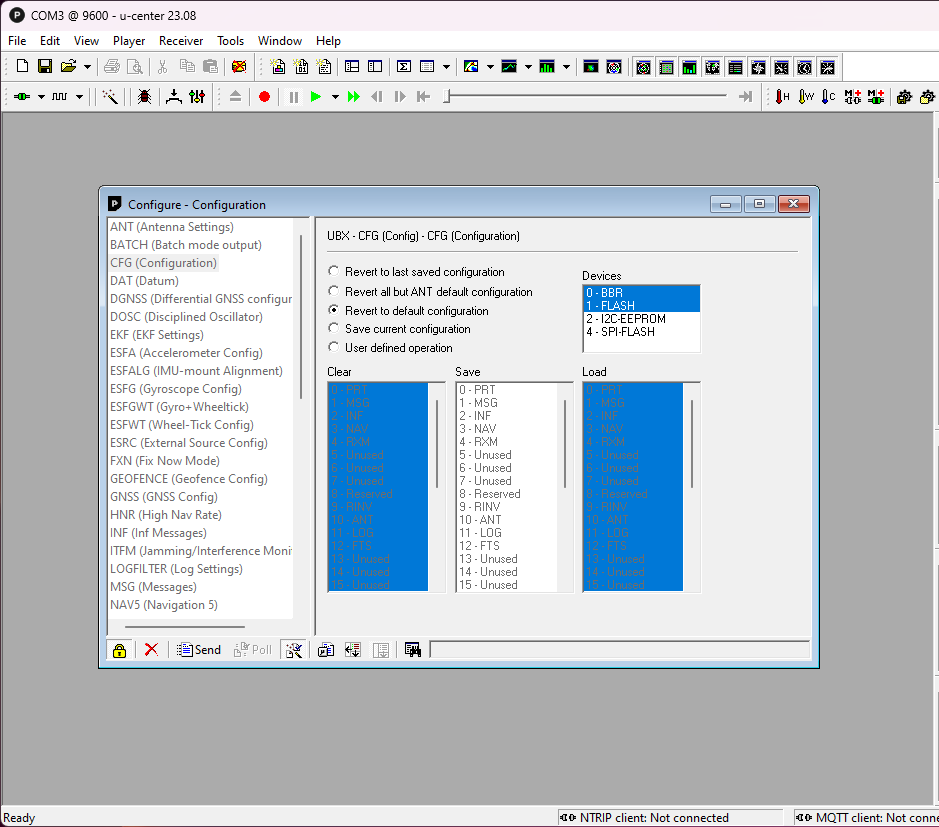
- Go to the CFG section and select 'Revert to default configuration'
- Click on 'Send' at the bottom of the configuration window
- Click on 'Cold Boot' in the top right of the main window
Connecting it all up
Plug the GNSS Receiver onto the Raspberry Pi's GPIO header. I used a 40-pin header between the Pi and the receiver to allow the GNSS board to sit higher up. This allows the SMA connector to fit without removing the Raspberry Pi from the case.
Connect the GPS antenna to the receiver board, and place the antenna somewhere with as much view of the sky as possible.
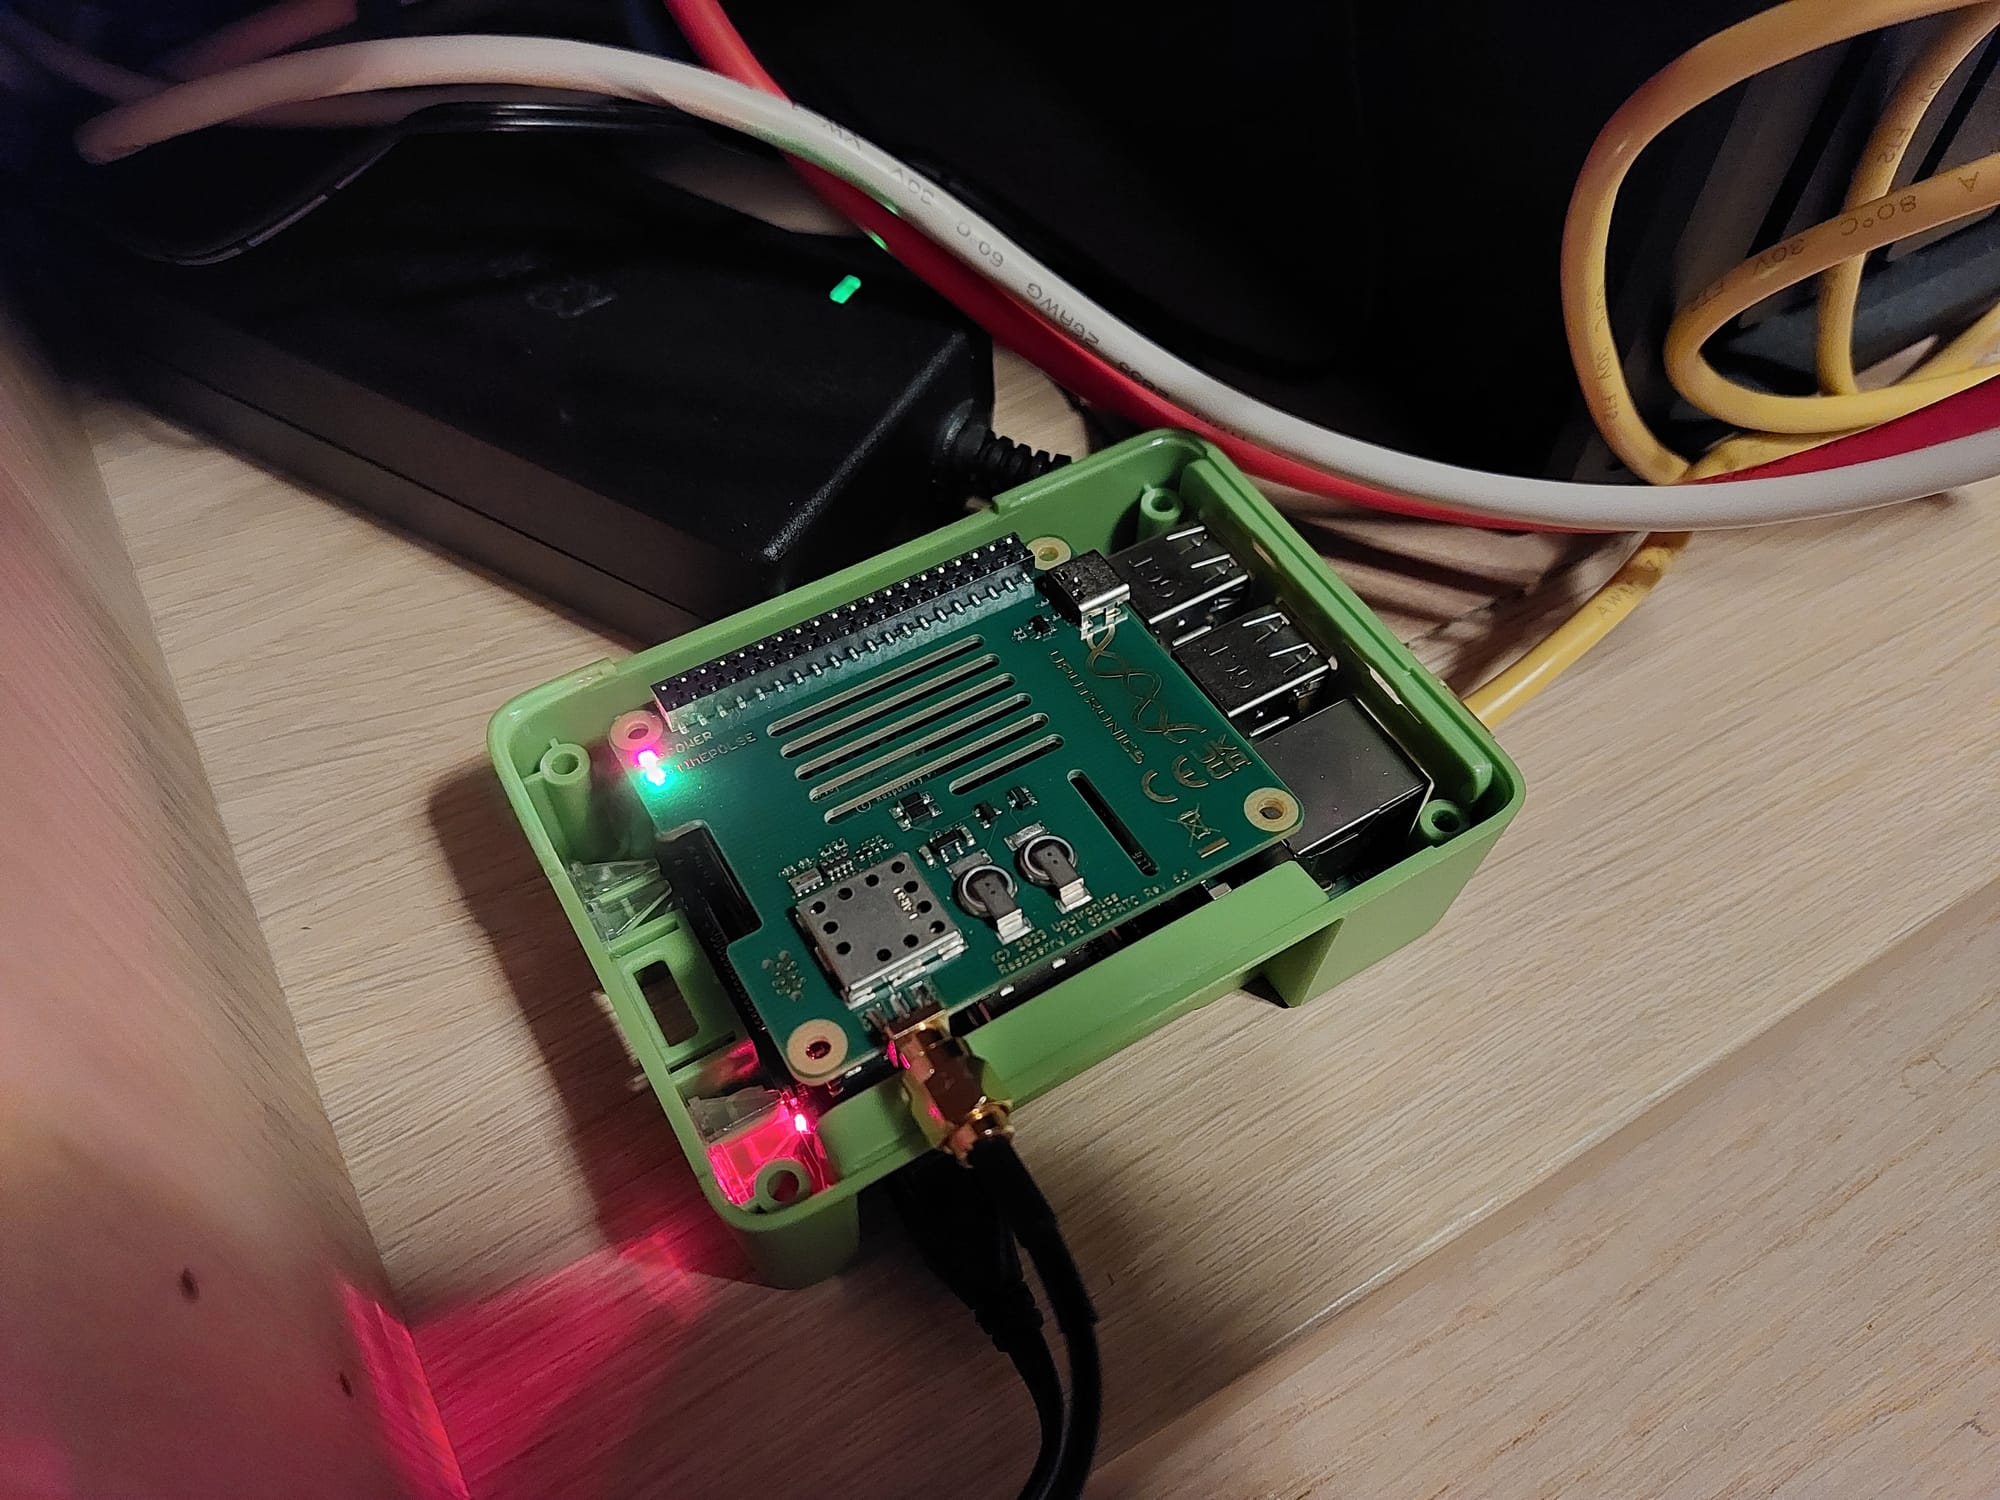
The red power LED should immediately illuminate. The green LED is tied to the time pulse. Don't worry if it doesn't immediately start to blink - it can take a few seconds to a few minutes for the GNSS receiver to get a fix and start putting out the 1 PPS signal. The time it takes depends on how good your antenna's sky view is.
Configuring the Raspberry Pi so it can interface with the GNSS receiver
We need to use the Raspberry Pi's serial port to communicate with the GNSS receiver. It needs a little tweaking to get it to operate at the GNSS Receiver's baud rate.
As of Jan 2024, the auto-baud isn't working, so we need to specify the baud rate
Open up raspi-config
sudo raspi-config- Go to section 3 - Interface Options
- Now go to I5 - Serial Port
- Say 'No' to the login shell over serial and 'Yes' to the serial port hardware being enabled.
Now we disable the serial console
sudo systemctl stop [email protected]
sudo systemctl disable [email protected]
Next, open /boot/config.txt so the baud rate can be set.
sudo nano /boot/config.txt
At the bottom, you'll see the line 'enable_uart=1'
Below this, insert the following to set the baud rate, turn off Bluetooth, and define the correct GPIO pins for the Uputronics board.
init_uart_baud=115200
dtoverlay=pi3-disable-bt
dtoverlay=pps-gpio,gpiopin=18
Save the file and exit.
Next we open up /etc/modules
sudo nano /etc/modulesAnd add the line below
pps-gpioSave the file and exit.
Now disable hciuart
sudo systemctl disable hciuartAnd reboot
sudo rebootInstalling GPSD
The GNSS receiver should now be able to communicate with the Raspberry Pi. The next step is to install and configure GPSD, which will handle the communications and make the useful data available to other services.
Install GPSD
sudo apt install gpsdOpen /etc/default/gpsd
sudo nano /etc/default/gpsdReplace the text with the following
START_DAEMON="true"
USBAUTO="false"
DEVICES="/dev/ttyAMA0 -s 115200 /dev/pps0"
GPSD_OPTIONS="-n"
Save the file and exit.
To ensure that GPSD runs on startup, run the following
sudo ln -s /lib/systemd/system/gpsd.service /etc/systemd/system/multi-user.target.wants/And reboot
sudo rebootTesting GPSD and PPS
After the reboot, we can test if the GNSS receiver is working using cgps.
cgps -sYou should see an output like the one below. (But with a lot more location information in it!)
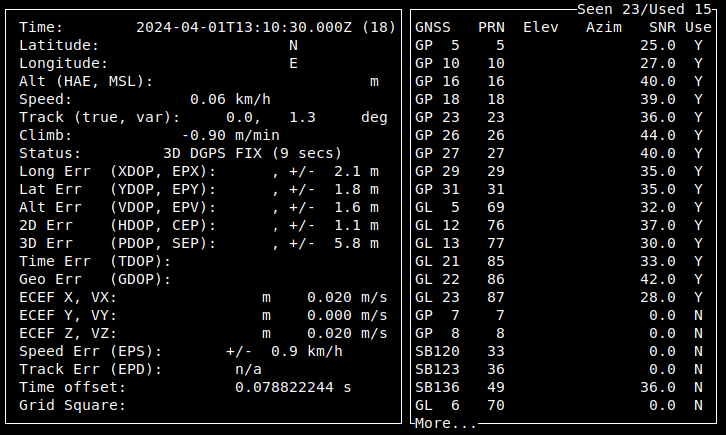
If GPSD is working, we can move on to test the PPS. To do this, we need a package called pps-tools
sudo apt-get install pps-toolsOnce installed, run ppstest
sudo ppstest /dev/pps0You should see an output like the one below, with a new entry every second.

Both the GNSS and PPS outputs are looking fine. We can now add them to Chrony.
Adding the GNSS Receiver and PPS to Chrony
All the useful GNSS timing data is now available on the Raspberry Pi. Chrony just needs to be told where to look for it.
Open the chrony.conf file
sudo nano /etc/chrony/chrony.confAdd our local clock settings above the source servers we defined in Part 2
# Local clock
refclock SHM 0 refid GNSS
refclock PPS /dev/pps0 refid PPS lock GNSS
Restart Chrony
sudo systemctl restart chrony.service
After a few seconds, we can check to see if Chrony is working with the new sources
chronyc sourcesYou can add the -v modifier to get explanation of the headings
You should see an output like the one below.

We can see that chrony is getting data from the GNSS receiver and the PPS input (indicated by the Reach). For more info on the outputs of 'chronyc sources', take a look at the documentation here.
As the GNSS samples are off by orders of magnitude compared to the internet time servers, Chrony has rejected the source as potentially invalid (indicated by the line starting with an X). That's OK, we'll tune the delay here a bit later (besides, it's only needed to tell Chrony which second the PPS pulse is indicating. Being off by a few tens of milliseconds is fine for that).
Chrony has selected the PPS input as the preferred source (indicated by the line starting with *), which is exactly what we want.
And with that, you've got a Stratum 1 server running, with RMS Offset down in the low hundreds of nanoseconds. That's an improvement of about three orders of magnitude compared to what we had before adding the GNSS receiver!

The next part of this guide will explore how to export the GNSS data and view it in Grafana. That will provide insight into most of the factors we want to monitor when optimising the system.

